One effective way to identify a table is through the use of a caption. Word can insert table captions, and will number them automatically, thereby providing a simple system to identify them. Our guide below will show you how to add a caption to a table in your Word 2013 document.
Inserting a Table Caption in Word 2013
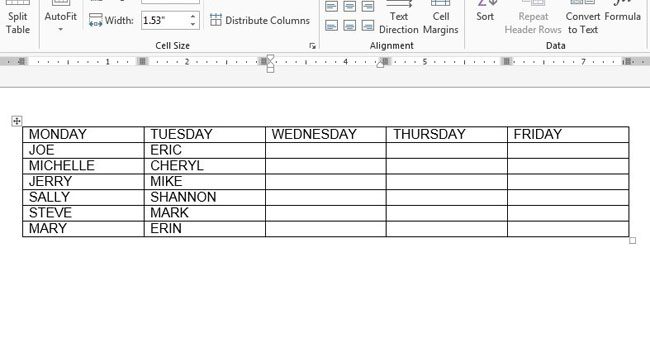
The steps in this article will assume that you already have a document containing a table, and that you wish to add a caption to that table. If not, this article will show you how to create a table in Microsoft Word. Step 1: Open the document with the table that you wish to caption. Step 2: Click in one of the table cells.
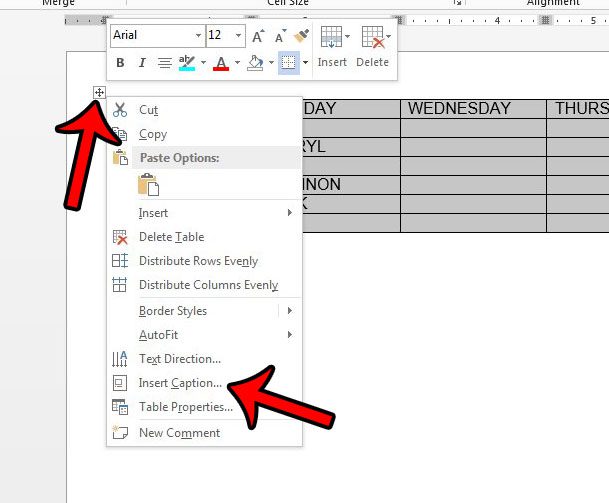
Step 3: Right-click on the icon at the top-left of the table with the four directions arrows, then click the Insert Caption option.
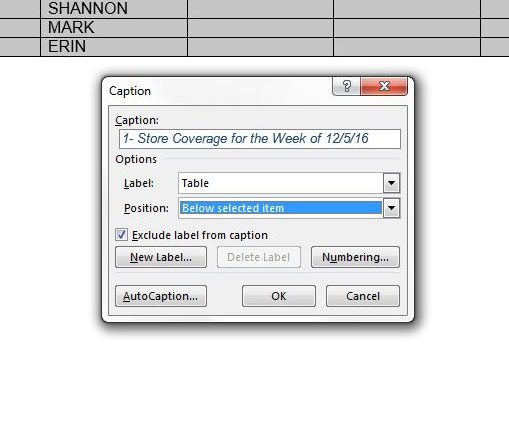
Step 4: Enter the desired caption into the Caption field, then make any desired changes to the formatting of the caption. For example, you could check the Exclude label from caption option if you don’t want the default “Table” wording to appear, or you could click the Position drop-down menu and choose to put the caption under the table. Once you are done, click the OK button.
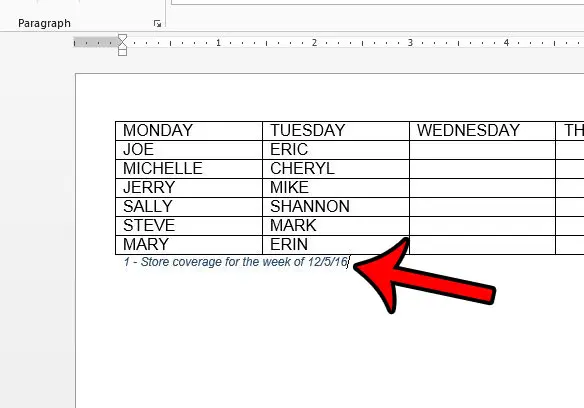
The completed caption will look something like in the image shown below. Note that you can modify the appearance of the caption text using the font options that you would use for other text inside your Word document.
Would you like to remove the borders that appear around your table? Click here to see how. After receiving his Bachelor’s and Master’s degrees in Computer Science he spent several years working in IT management for small businesses. However, he now works full time writing content online and creating websites. His main writing topics include iPhones, Microsoft Office, Google Apps, Android, and Photoshop, but he has also written about many other tech topics as well. Read his full bio here.


