Turn On Night Light on Windows 11
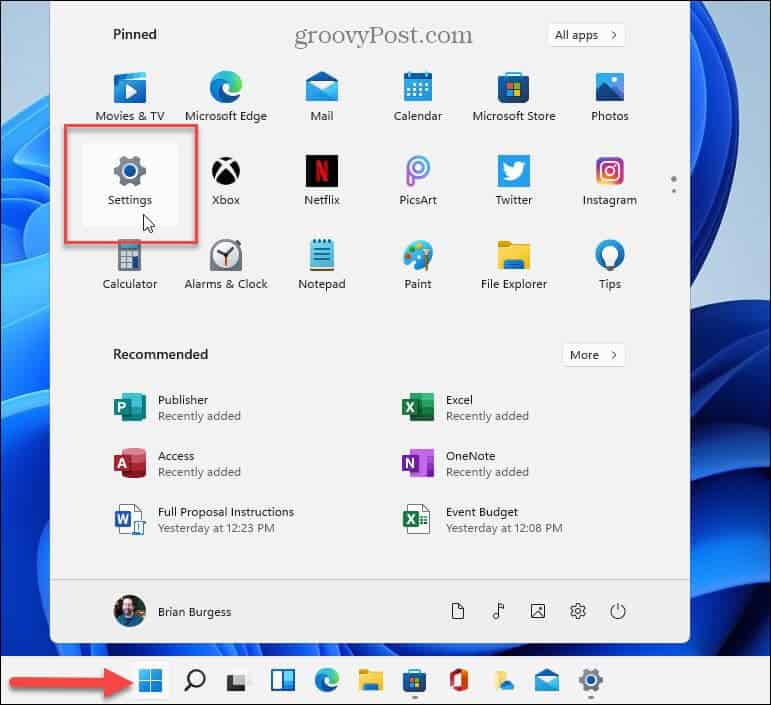
To get started, open Settings by going to Start > Settings or using the keyboard shortcut Windows key + I to open the Settings page directly.
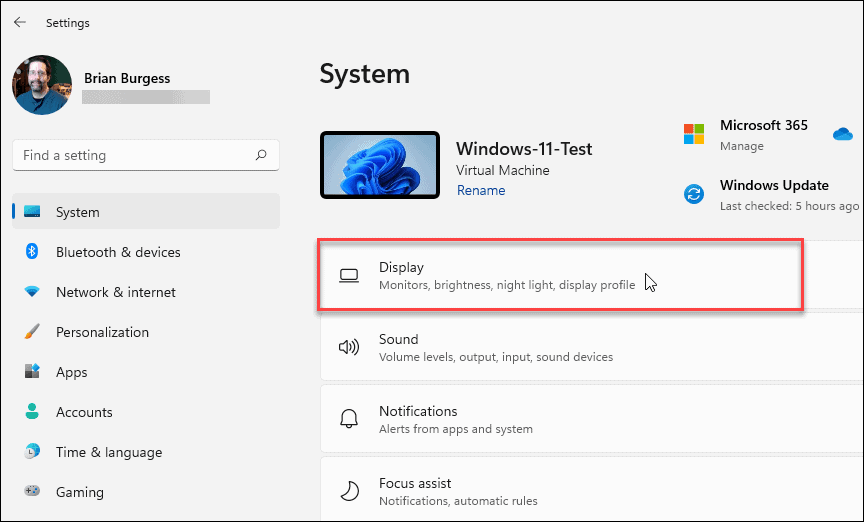
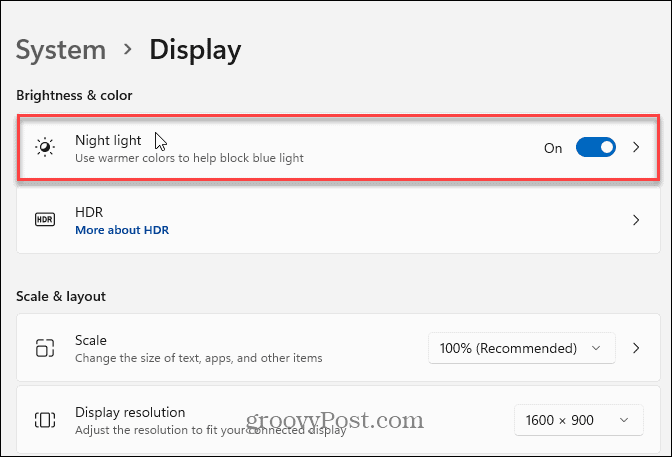
Once the Settings page is open, click on System from the panel of options on the left. On the right side, click on the Display option.
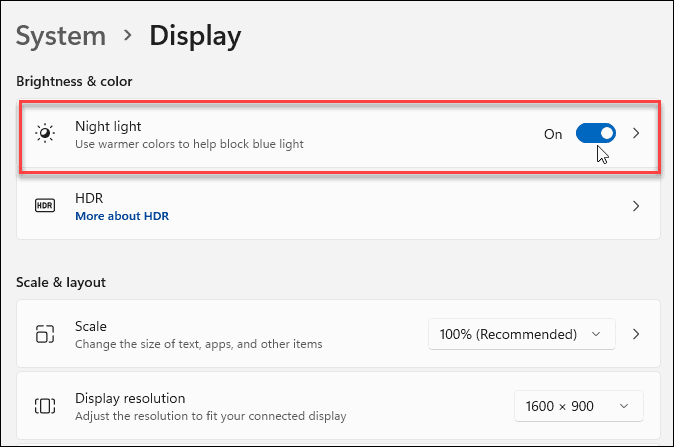
Toggle on the Night Light switch under the “Brightness & color” section to enable the feature.
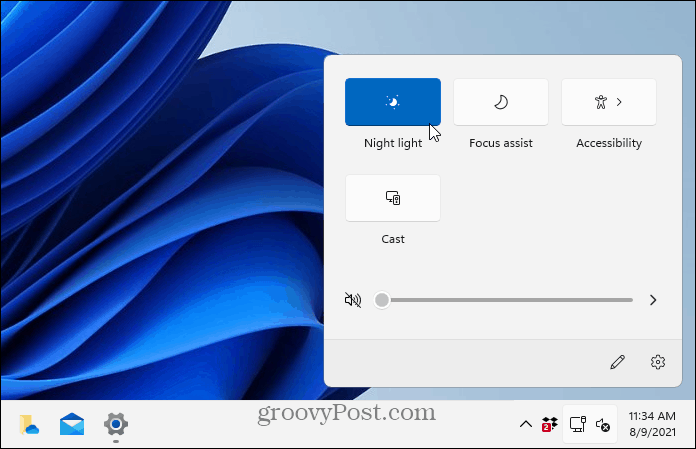
Note: It’s also worth pointing out that you can use the keyboard shortcut Windows key + A to open Action Setting on Windows 11. It comes up in the lower-right corner above the clock. Then you can click the Night Light button on or off.
Night Light Settings on Windows 11
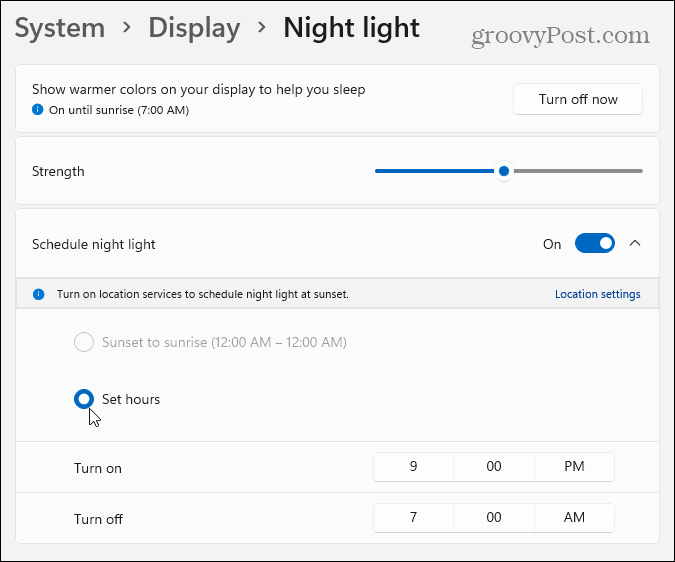
To adjust the settings of Night Light, click on its setting (not just toggle the button on or off).
That will open the Settings page shown below. This is where you can change the strength of the feature using the slider. You can turn it on or off by clicking the “Show warmer colors on your display to help you sleep” button. And this is the page where you can schedule Night Light to turn on or off automatically on the schedule you set up for it.
That’s all there is to it. If you have a PC, you keep it in your bedroom. This is also a good option if you have to check it from time to time in a dark environment. And you don’t want your eyeballs burned out. And for more on the Windows 11 UI experience, take a look at hiding the taskbar. Or read how to move the Start button to the left corner of the screen. In fact, one the reasons I came back to Windows was the mnemonic shortcut keys, which speed things up a bunch (e.g., in Outlook’s spell check). Thanks! :-) Comment Name * Email *
Δ Save my name and email and send me emails as new comments are made to this post.
![]()

