Powerpoint presentations are often printed as handouts so that audiences can follow along, or if a group of people are collaborating on a presentation and need to take physical notes instead of working on the digital file. But the default print setting in Powerpoint 2013 will print every slide on its own page, which can waste a lot of ink and paper. Fortunately, Powerpoint 2013 provides you with the ability to print multiple slides on one page. There are two options available to you as a Powerpoint 2013 user when it comes to printing 4 slides on a page, so continue reading below to learn what each option means so that you can select the one that best meets your needs.
How to Print 4 Slides Per Page in Powerpoint 2013
Our article continues below with additional information on printing multiple slides per page in Powerpoint 2013, including pictures of these steps.
Printing 4 Slides on a Page in Powerpoint 2013 (Guide with Pictures)
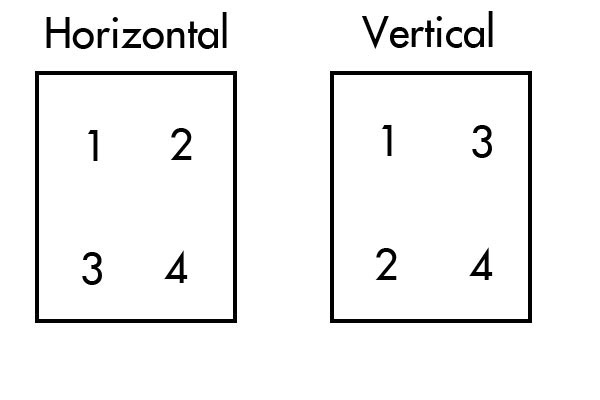
The steps in this article will show you how to change the Print settings for your currently open Powerpoint presentation. We will be printing 4 pages on one page, and you will have the option to choose between “4 Slides Horizontal” and “4 Slides Vertical.” The ordering of the slides will vary depending upon which option you choose. The image below indicates the positioning of your slides, by number, based on selecting either the horizontal or vertical option.
Step 1: Open your presentation in Powerpoint 2013.
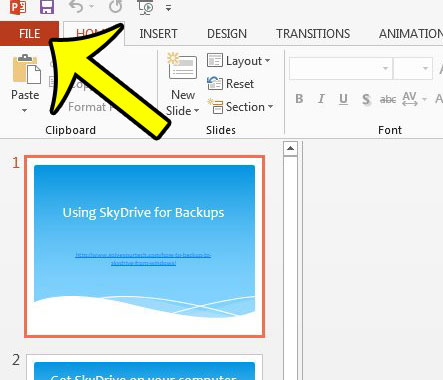
Step 2: Click the File tab at the top-left corner of the window.
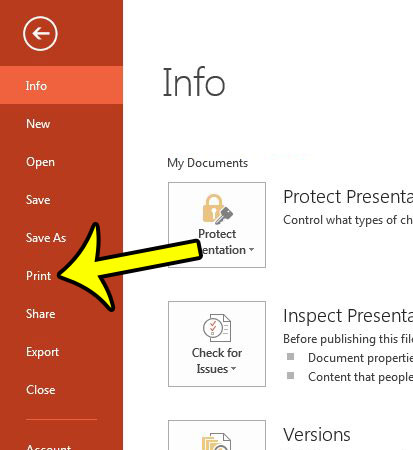
Step 3: Click the Print option in the column at the left side of the window.
Note that you can alternatively open this menu more quickly by pressing Ctrl + P on your keyboard while you are in the regular Powerpoint interface.
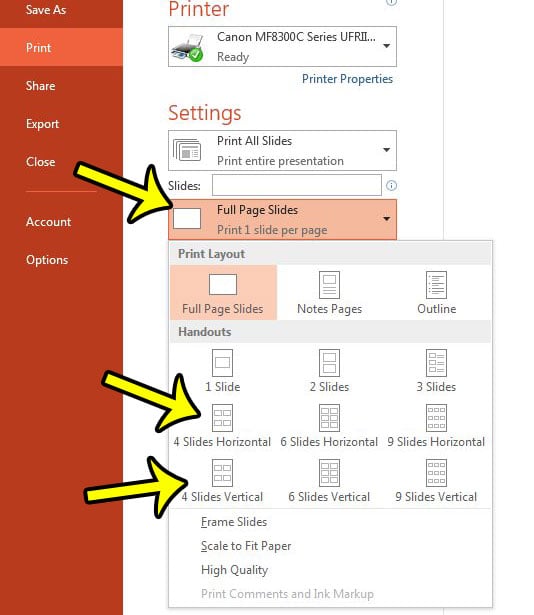
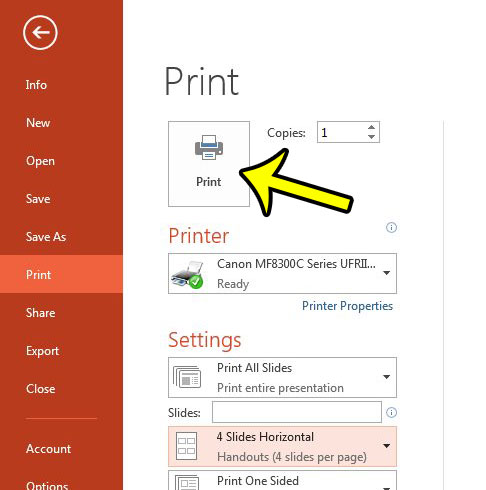
Step 4: Click the Full Page Slides button in the Settings section, then select either the 4 Slides Horizontal or 4 Slides Vertical option.
You can refer to the image at the beginning of this tutorial concerning the layout of these two choices. Note that you also have the option to print 2, 3, 6, or 9 slides on a page instead.
Step 5: Click the Print button at the top of the window to print your slides with your selected configuration.
More Information on How to Print Multiple Slides Per Page in Powerpoint 2013
Depending on your printer’s settings you may find that the application is printing these slides on the front and back of the pages. If you do not want this to happen then you will need to change the setting in the dropdown that appears below the option we changed in the steps above. While I performed the steps in the guide above using Powerpoint 2013, you can also use these same steps if you want to print multiple slides on one page in newer versions of Powerpoint. For example, this process is still the same in the Powerpoint for Office 365 version of the application. If you are printing multiple copies of this presentation then you may also wish to select whether or not to collate the printed document. Choosing to collate it can save you some time later as everything will already be sorted into individual files. The available options for printing multiple slides per page are:
1 Slide2 Slides3 Slides4 Slides Horizontal4 Slides Vertical6 Slides Horizontal6 Slides Vertical9 Slides Horizontal9 Slides Vertical
As you would expect the content on these slides is going to get pretty small as you choose to print more and more slides per page. If you are uncertain as to whether or not it is going to be tough to read you may want to print out a single page and see if it meets your needs. Would you like to change the page orientation for the slides in your presentation? Learn how to switch between portrait or landscape orientation in Powerpoint 2013 if your slideshow would be more effective with a different orientation.
Additional Reading
He specializes in writing content about iPhones, Android devices, Microsoft Office, and many other popular applications and devices. Read his full bio here.
