Maybe you need to edit a spreadsheet on one side of the screen and view the source data on the other. Or, it can be more leisurely. You can have an email or document open while having YouTube or other video apps playing on the other side. Here is a look at how to use the feature and manage your split screens.
Use Split Screens on Chromebook
Using split screens or “side-by-side view” on your Chromebook works much as it does on a Windows PC. And there are a couple of ways you can manage them. First, we’ll look at the drag and drop method. Launch the first app you want to display and drag it from the title bar over to the left or right edge of the screen. An outline will form showing where the screen will be and let go of the mouse/trackpad to dock it. Before releasing the screen, it will look something like the following:
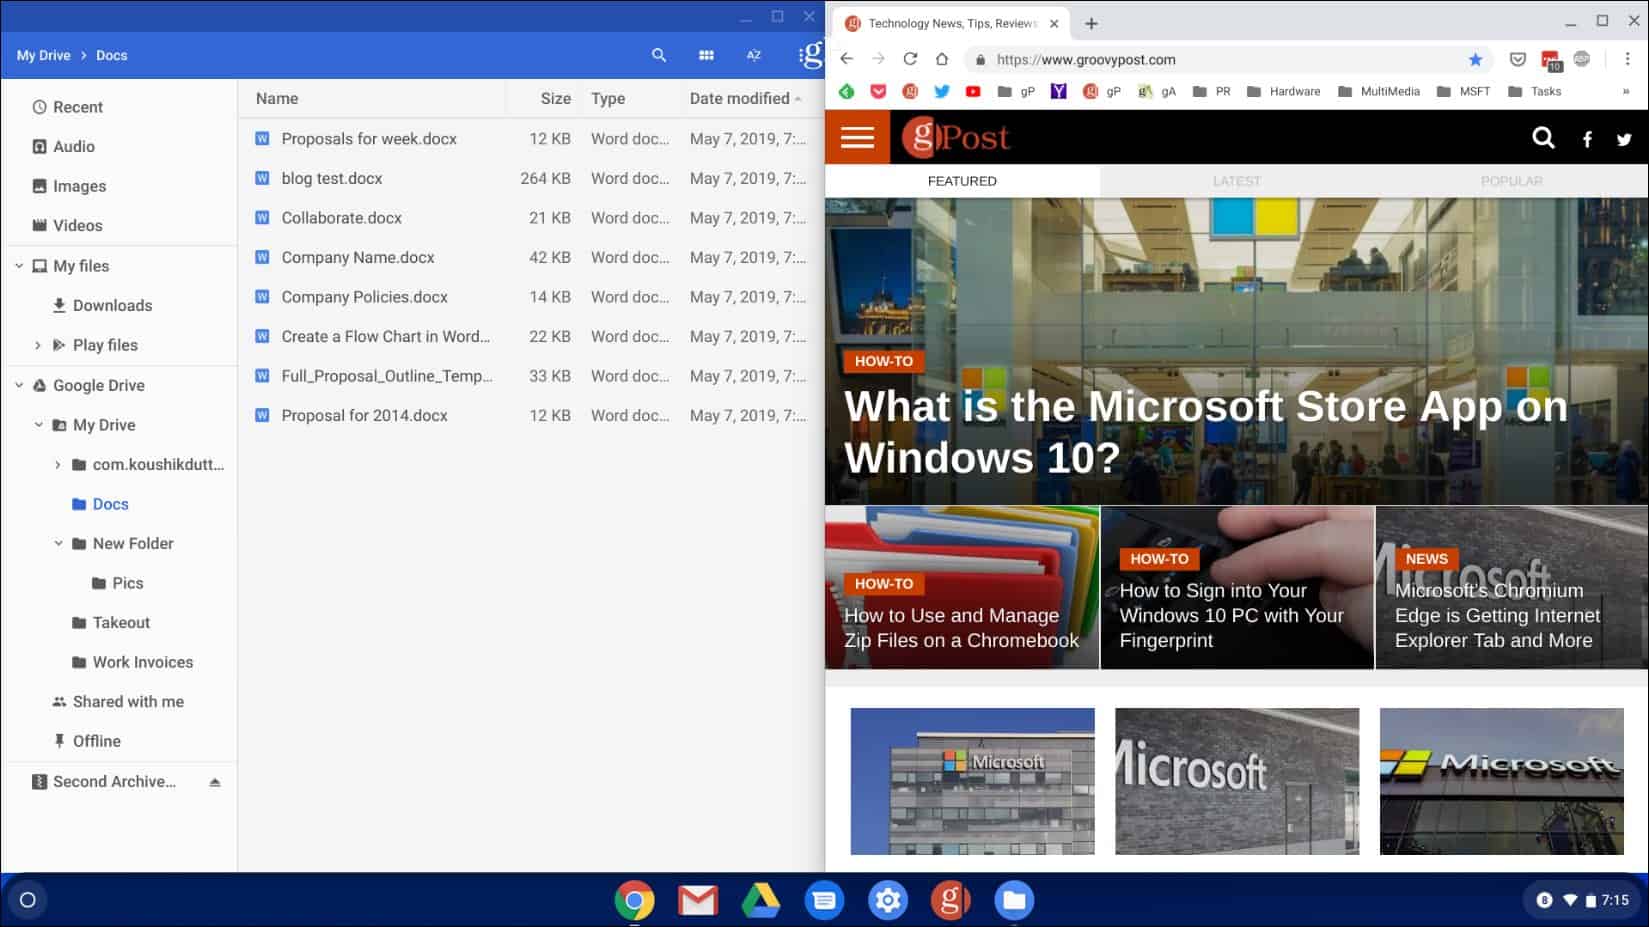
Then open your second app or tab and do the same but drag it to the other side of the screen and release it. For example, in the shot below, I have Chrome open with the Files app.
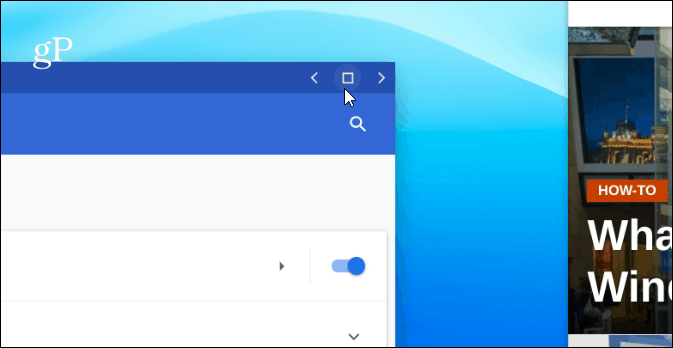
Another way you can manage split screens is to click and hold the Maximize button until you see arrow icons. Then you can snap the screen to the left or right of your screen.
The app will be sent over the side you selected and automatically fit the side of your screen. For the second app or window, do the same, but send it to the other side of the screen. Your two screens will fit your full display side-by-side.
Conclusion
It’s also worth noting that this will work with many Android apps (not all) and tabs in Chrome and other Chrome OS apps. In addition to using a mouse or trackpad, you can do the same if you have a touchscreen. Just press and hold the Maximize button and then the left or right arrow. You can also use the keyboard shortcut Alt + ] to move a window to the right. Or, Alt + [ to move it to the left of the screen on your Chromebook.
![]()


